The Process
The Process
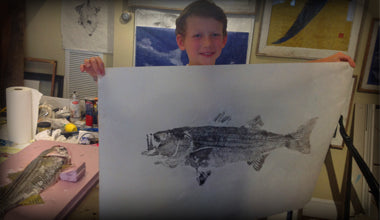
There’s no one way to make a fish print but here’s how I do it.
Most of you know how to catch fish, but if you are planning to keep a fish for printing, make sure you are prepared to keep it fresh. It takes between 2 and 4 hours to complete a print, so the fish should be immediately placed on ice after it’s caught. The meat will survive the printing process very easily and make for a great meal after you’ve made your prints. I find the best way to transport a fish is in the fish boxes you can pick up at your local fish market- it’s typically how they get whole salmon or large fish shipped to them and most markets will gladly give them to you.
Once you’ve (hopefully!) caught a fish, avoid making punctures, cuts, gaff marks to the fish - meaning don’t gut it. Any puncture or cut will show on the print.
When it come to the species of fish a good rule of thumb is the scalier the better. Striped bass, black sea bass, and scup make for great prints because of the detail. Bluefish, false albacore, mackerel and other tunoids are a lot more difficult to print.
Tools of the trade.
For starters - keep it simple. Buy some rolls or large sheets of sumi paper, which is thin rice paper or newsprint, a couple of 1” paintbrushes, some black ink or some water-soluble block printing ink, and something on which to place the fish. I like the pink foam insulation board you can find at your local hardware store.
A well prepared fish.
One of the more crucial steps in making fish prints is the preparation. This involves a lot of washing, scraping, poking, and prodding. If it’s a fish with a lot of slime, you’ll want to clean it thoroughly. Not only will it make your prints less stinky, it will allow the ink to much better adhere to the paper. I use a little lemon juice and scrape the fish with a chef’s knife to help lift the gooey stuff.
When the fish is clean, you’ll want to choose the side from which you’ll be making the print. After you’ve picked a side to print, remove the eye. The reason for this is that you’ll get a nice clean circle to indicate where the eye is and you can paint it in later on. Removing the eye is a bit messy and there is no great way to do it, it took me about half a dozen times before I could do it with ease. A good rule of thumb is that when you remove an eye or a fin, remember where you put them, the last thing you want is a pet or small child running around with fish bits in their mouths.
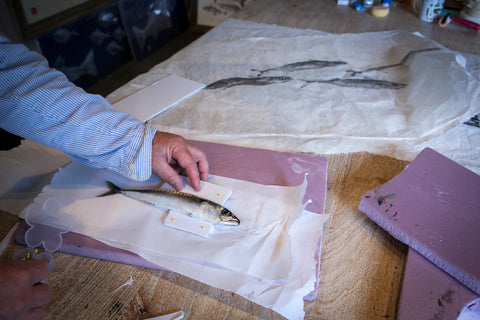
Place the fish on a large enough piece of insulation board to hold the fish. You’ll need some pins. I raided my wife’s sewing kit and borrowed some of hers, I also used one of her Pampered Chef knives to scrape the fish and a few of her favorite glasses and containers to hold inks and paints. I recommend that if you’re already on thin ice with your fishing time you buy your own supplies and don’t go near your wife’s stuff. Lesson learned.
Great fin display is one of the key parts of making the fish appear alive. I open up the dorsal, anal and pelvic fins and pin behind the bone of the fins to keep them open. You may want to prop up the dorsal fin with some extra foam, cardboard or sponge material before pinning to make it easier. I’ll open up the tail fin and the pectoral fins and lightly pin them. I also position the mouth by positioning pegs inside the mouth. Once you have fins pinned let the fish dry out for an hour or so- you’ll then be able to remove the pins and they should stay open. At this point your fish should look like a mounted fish.
Get inked.
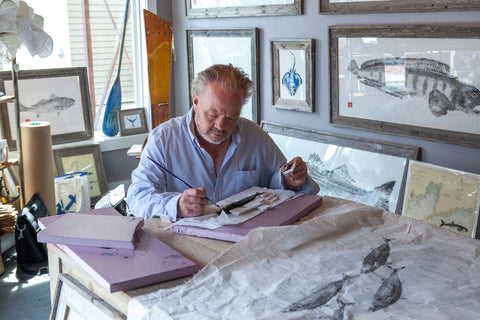
The first few prints I created were with black ink, as I got more confident in my skills I added more color. You’ll want to keep your first prints simple-so keep it to one or two ink colors. You can use paintbrushes, small rollers, your fingers, really anything will do.
Paint the fish with the ink. You can’t really do anything wrong at this point, you just want to make sure the ink is spread evenly—you want to paint ‘sparse’ – just enough ink to cover the fish and avoid puddles or pools of ink.
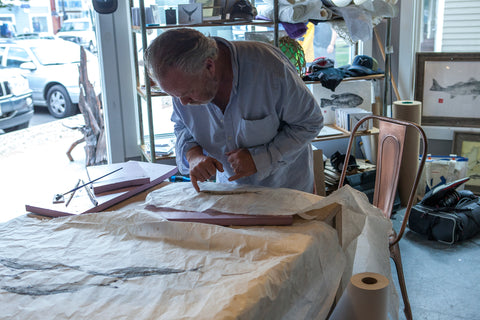
Once you’ve placed the paper on the fish there’s no going back. Gently lay the paper over the fish making sure that you have enough paper to cover the head and tail. I like to start right below the gill in the middle of fish. I gently rub and push my fingers towards the edges of the head trying to imagine what the fish looks like as I do. Once I have the head done I go down the lateral line of the fish and gently roll my fingers down the side, when I get to a fin I make sure I get the bones and ridges. It’s okay to peek at your print as it progresses, just don’t shift the paper, no one likes a crooked fish. Continue down to the dorsal fin and end your rubbing with the tail. This process is quick and shouldn’t take more than a few minutes. If you want an area to appear darker apply more pressure in that area, if you want it to appear lighter don’t rub very hard at all. Gently peel back the paper and see what you’ve done. If it looks at all like a fish that’s all you can ask.
Finishing touch.
To finish off your print you can paint in the eye or any other details. I take photos of the fish before I print and use them for reference. A well-painted eye can bring a print to life. At this point you can also add in stripes, dots or additional color. I prefer to leave the prints alone and not fix the mistakes or errant brush marks or smudges. If you’d like more information or have any suggestions on how to remove ink stains out of carpet you can email me at higginsad@mac.com. Or better yet, come to one of my classes or fish print nights and I’ll teach you myself.